

I like cartoons, and I really enjoy having kids so I have a good excuse to watch cartoons. Once in awhile, a cartoon comes along that we all can enjoy, and it has occurred and is on Cartoon Network. It's weird, it's funny, it's sometimes creepy, it's got adult moments without being too salty.
But enough about my feelings, you are probably here for the hat, which is not unlike the one adorning the human living in Ooo.
This pattern fits about a 19-21 inch head, because of the stretch of the fleece.
For the free pattern, click here or copy this URL and paste it in your browser.
https://docs.google.com/file/d/0Bzr8dMgZCJipU3gzX1RiN1BmQ2M/edit?usp=sharing
(when you print, be sure that the check mark for the "fit to page" is UN-checked)
This is my first pattern I've made to share, so please be patient!


DIFFICULTY LEVEL: easy peasy. I am going to use overly explanatory explanations for the nervous beginners because you guys rock for trying something new. If you need information on sewing with fleece, check out http://coatsandclarksewingsecrets.blogspot.com/2012/01/sewing-on-fleece.html
TIME NEEDED TO COMPLETE: one hour, but don't be angry with me if I'm wrong. It really depends on skill level and if you have children.
MATERIALS:You will need a half yard of white fleece. If you want a contrasting lining, get a half yard of fleece in your choice of color. Check to see that they stretch about the same. Oh, and white thread and your choice of closure, i.e. Velcro, large snap closure.
Repeat, cutting the contrast/lining, omitting the "ears".

I use a straight stitch set at 3.0 for this project. You can do that or use a zigzag stitch. I don't care, I'm not the sewing police.
Sewing instructions are as follows:
1. Make your "ears" by sewing two together, right sides together and using a half inch seam allowance, then turning,.

 2. Lay your hat out flat with right side up. Position "ears" x and o over x and o on hat, then fold hat, right sides together, as shown. Your "ears" will be sandwiched in with all x's and o's matching. Pin in place. Starting at top of the point on the hat, stitch down the edge, catching in the "ears", using a half inch seam allowance. Repeat on the other side. You will now have two points.


3. Pin remaining raw edges of hat, right sides together, and stitch through curve and down to the bottom, as shown.

4. Lay your contrast/lining out flat with right side up and fold hat as you did in step two with the hat, omitting the part about the ears. Starting at the top of the point, stitch down the edge; repeat on the other side. Two points.

5. Pin remaining raw edges of contrast/lining , right sides together, and stitch through the curve and down to the bottom as you did with the hat.

 6. You can admire your hat and your contrast/lining, which looks strikingly similar hopefully. Enough admiring, back to work.
 With right sides together, place the lining over the hat and pin so the back of the hat seams match up.
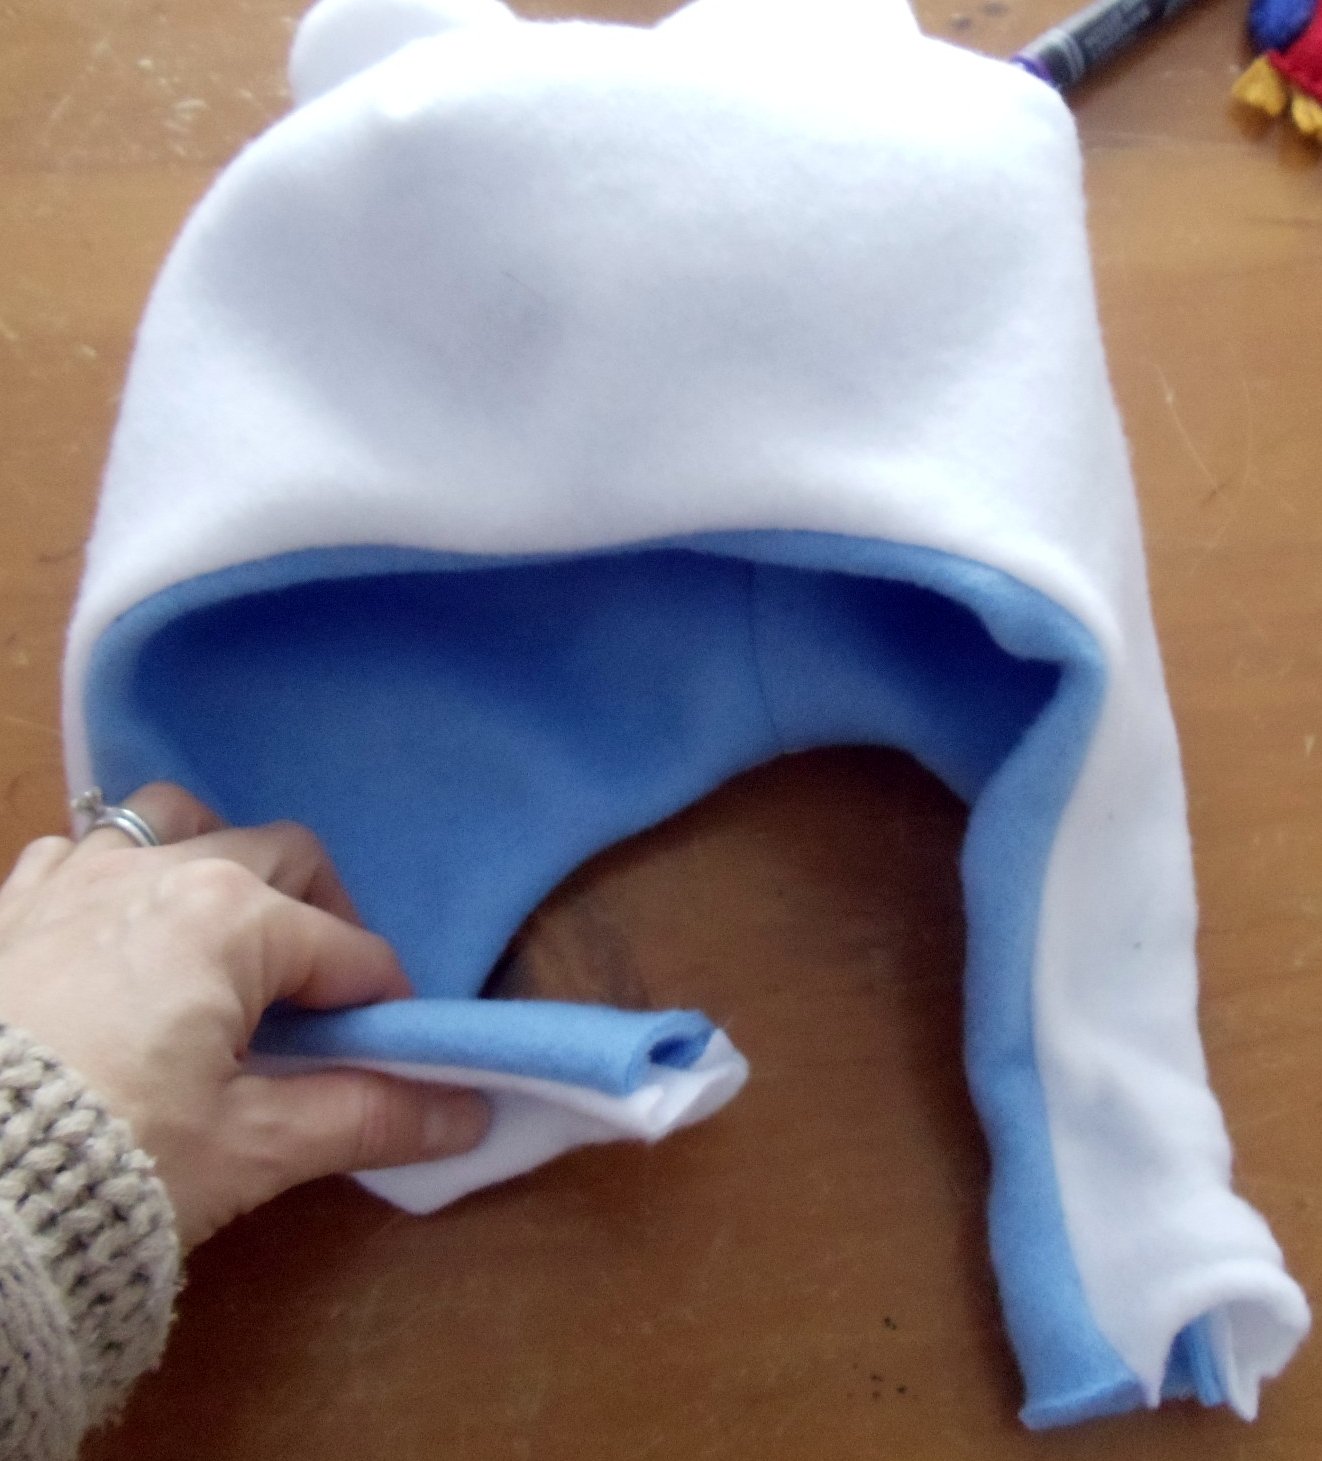
7. Stitch raw edges together, leaving the bottom portions open for turning.


8. Turn, pulling through the opening so right sides are out. Adjust and stretch a bit around the hat so it looks nice and no contrast peeks out.


 9. Tuck in the bottom flap raw edges about an inch and pin in place.

 10. Top stitch a half inch around the entire hat, closing up the bottom flap edges.

11. Put a closure on the flaps: many prefer Velcro, I use a big snap closure. What's your preference?
12. Don your sweet dome piece and find your adventure.
P.S. If you like this pattern, perhaps you might enjoy a bunny hat, just in time for Easter! I use the majority of this pattern in my newest post on making a Bunny Hat!
Thank you to Chelsea for her helpful post about sharing a pdf. Find out how at http://stayingsteyn.blogspot.com/2012/01/how-to-share-pdf-in-blogger.html
(when you print, be sure that the check mark for the "fit to page" is UN-checked)
This is my first pattern I've made to share, so please be patient!


DIFFICULTY LEVEL: easy peasy. I am going to use overly explanatory explanations for the nervous beginners because you guys rock for trying something new. If you need information on sewing with fleece, check out http://coatsandclarksewingsecrets.blogspot.com/2012/01/sewing-on-fleece.html
TIME NEEDED TO COMPLETE: one hour, but don't be angry with me if I'm wrong. It really depends on skill level and if you have children.
MATERIALS:You will need a half yard of white fleece. If you want a contrasting lining, get a half yard of fleece in your choice of color. Check to see that they stretch about the same. Oh, and white thread and your choice of closure, i.e. Velcro, large snap closure.
 |
| When you lay out your pattern on the fleece, check to make sure it will stretch in the direction indicated. Use weights or canned goods to hold pattern in place. |
 |
| Trace around your pattern with a washable marker onto the fleece, then cut just inside the marker lines. Mark the Xs and Os with your marker on both sides of fabric. |
 |
| Traced pattern |
 |
| cut just inside your marker lines |
Repeat, cutting the contrast/lining, omitting the "ears".

 |
| Your hat and ears and lining. |
I use a straight stitch set at 3.0 for this project. You can do that or use a zigzag stitch. I don't care, I'm not the sewing police.
Sewing instructions are as follows:
1. Make your "ears" by sewing two together, right sides together and using a half inch seam allowance, then turning,.

 2. Lay your hat out flat with right side up. Position "ears" x and o over x and o on hat, then fold hat, right sides together, as shown. Your "ears" will be sandwiched in with all x's and o's matching. Pin in place. Starting at top of the point on the hat, stitch down the edge, catching in the "ears", using a half inch seam allowance. Repeat on the other side. You will now have two points.


3. Pin remaining raw edges of hat, right sides together, and stitch through curve and down to the bottom, as shown.

4. Lay your contrast/lining out flat with right side up and fold hat as you did in step two with the hat, omitting the part about the ears. Starting at the top of the point, stitch down the edge; repeat on the other side. Two points.

5. Pin remaining raw edges of contrast/lining , right sides together, and stitch through the curve and down to the bottom as you did with the hat.


7. Stitch raw edges together, leaving the bottom portions open for turning.


8. Turn, pulling through the opening so right sides are out. Adjust and stretch a bit around the hat so it looks nice and no contrast peeks out.


 10. Top stitch a half inch around the entire hat, closing up the bottom flap edges.
11. Put a closure on the flaps: many prefer Velcro, I use a big snap closure. What's your preference?
12. Don your sweet dome piece and find your adventure.
 |
| Thank you to one of my favorite people, Mary, and her friend Jonathan, for making this pattern look so good! |
P.S. If you like this pattern, perhaps you might enjoy a bunny hat, just in time for Easter! I use the majority of this pattern in my newest post on making a Bunny Hat!
 |
| Easter Bunny hat utilizing the Finn Hat pattern! Find it here. |
Thank you to Chelsea for her helpful post about sharing a pdf. Find out how at http://stayingsteyn.blogspot.com/2012/01/how-to-share-pdf-in-blogger.html
Thanks for the pattern. This is one of the best ones I've seen. My son loves Adventure time.
ReplyDeleteAdorable!!!
ReplyDeleteThese are really cute, I'm thinking about using them as gifts for the babies I take care of! thank you!
ReplyDeleteGoing to try making this for my 3 granddaughters...may make one for me as well! Thanks so much for sharing. :-)
ReplyDeleteIt's truly a nice and helpful piece of information. I'm happy that you simply shared this helpful info with us. Please stay us informed like this. Thanks for sharing. my page -
ReplyDeletedesigner kids clothes
Kids knitwear
ahhh. I didnt fold my fabric. so now I have two pieces...
ReplyDeletedid it say to fold your fabric... to make one piece. ;__;
oh well...
I'm sorry! Fleece is forgiving....if you do a 1/4 inch seam where it should have folded, you can still pull it off. I checked my pattern and I saw that there was a ^______fold_______^ on the pattern piece. I'm glad you asked; I do make mistakes and want to improve.
DeleteIt turned out great! Thank you so much! :D
ReplyDeleteThis says it is for a 19-21 inch head, but the pictures look like the hat fits a little loose! Are the hats tight or is it a lose fit for 19-21 inches? This is a very nice pattern by the way!
ReplyDeleteI made those hats before I made the tutorial/pattern! They were a little bigger, so I tweeked it a bit.
DeleteI am very grateful for this! My son wants to be Finn for Halloween. My 1 yr old daughter is going to be Wildberry Princess. One thing that would be SUPER helpful is a picture of the back. I have never made a hat before so I just need to see what the back is supposed to look like. Mostly just to get it oriented in my brain so I know exactly where all the seems will be. Thanks Again!
ReplyDeleteLet me see what I can do for you :)
DeleteSo, it's Halloween morning, and my son has LOST his Finn hat needed for his costume this evening...SO, since the costume rests mainly on the hat, I googled a pattern for it, and I found your tutorial! Thank you SO much! I am getting ready to make this now! Thank you so much!
DeleteSincerely, The Crafty Book Goddess!
You are so welcome! I'm glad to help!
DeleteI have never sewn a pattern before and actually managed this one!!! I whipped this thing out, hand sewn in a little over an hour. Thank you so much!! Great instructions!
ReplyDelete